Thursday, June 26, 2025

Trip to Italy: Day 11 (Back to US)

We spent the afternoon downtown doing some sightseeing and shopping. The next day, we took the Malpensa Express to MXP, which leaves every 30 minutes from Milano Centrale. It costs 13 EUR and takes about 50 minutes.  

Another option is the bus shuttle from Milano Centrale, which costs 10 EUR and takes about 80 minutes. You can buy tickets here. By comparison, a taxi/Uber ride to MXP from our hotel was 155 EUR.

The Alps

General tips

  1. I’m a bit paranoid about losing my passport abroad. Rome—like most big cities in Europe—is known for pickpocketing in crowded areas. To protect against that, I bought these boxers, which turned out great. They have two side pockets that can easily fit a passport and a wallet each, and they’re comfortable to wear.
  2. You can use Uber to order a taxi in large cities such as Rome and Milan. In Rome, the minimum fare was 9 EUR, and the maximum fare shown in the Uber app was honored. In Milan, the minimum fare was 14 EUR, but the maximum was not guaranteed, so we ended up paying more compared to the Uber Black fare.
  3. You can pay for pretty much everything using Apple Pay with your phone or watch, so there’s no need to carry a physical card. Unlike other countries where some small shops have a card minimum, that wasn’t the case here. The only things we had to pay cash for were the gondola in Venice and church donations.
  4. One thing we didn’t realize is that the next train stop after Lake Como San Giovanni is a city called Chiasso, which is just six minutes away—in Switzerland! A fun bonus if you want to add another country to your visit.

Hope you find this guide useful—and let me know in the comments if you have any questions or other tips!

<< Day 10 (Papal Audience) Trip Itinerary |

Trip to Italy: Day 10 (Papal Audience)

We learned that the metro was the quickest and most reliable way to get to the Vatican from our hotel. We departed a little after 7 a.m. and had a quick (typical) Italian breakfast—cappuccino and cornetto—at a café across from the hotel. We then took the metro and arrived at the Vatican around 7:50 a.m. We were in line for about 30 minutes. Before the security checkpoint, they checked our bags and asked us to leave any metal water bottles aside. I didn’t mind losing mine, but my son had a Hydro Flask with multiple stickers that were meaningful to him. Since we were both using metal bottles, we lost our entire water supply—and it was hot!

Line to enter Papal Audience

When you reach the seating area, we recommend sitting next to one of the wooden barriers if you want to see the Pope up close. We were seated in direct sunlight for about 1.5 hours. Fortunately, we were near a water fountain at the back, so we were able to cool off periodically. I recommend bringing small rags or towels that you can dampen at the fountain. It also seemed that plastic bottles were allowed, so definitely bring disposable bottles that you can refill. And bring some wipes—many of the chairs had bird droppings.

Before Papal Audience

Pope Leo XIV came out on the Popemobile around 9:50 a.m. He circled through all the wooden barriers before starting the Papal Audience, which lasted about an hour and concluded with a blessing.

Pope Leo XIV

We then made our way back to the metro station, taking our time to avoid the crowds. By the time we got there, the metro wasn’t crowded. We returned to our hotel, picked up our luggage from storage, and then took a train back to Milan.


<< Day 9 (Rome & The Vatican) Trip Itinerary | Day 11 (General Tips) >>


Trip to Italy: Day 9 (Rome and The Vatican)

I had booked tickets for the Vatican Museums, which include the Sistine Chapel. Because I booked within a week of our visit, only guided tickets were available. I strongly recommend purchasing tickets in advanced, as the walk-in line was over 2 hours long in the sun!

The guided tour was worth it, but it’s 2 hours long, so only book it if you have the time. Also, note that the entrance to the museum is not the same as the entrance to St. Peter’s Basilica. The museum entrance is on the right side (toward the Ottaviano Metro station).

The Gallery of Maps

Make sure that everyone (including children) has identification that matches the online reservation. They accepted our U.S. driver’s licenses, but most people were showing passports. This isn’t required for security reasons, but to prevent scalpers from reselling “skip-the-line” tickets.

School of Athens by Raphael

I had also booked tickets for the Papal Audience back in February via the Prefecture of the Papal Household.  You book them online and wait for an email confirmation containing your reservation number and the number of tickets requested. We noticed tickets were still available even two days before, and we learned the next day that in most cases, you don’t even need to show the ticket to enter the Papal Audience, but better to be safe than sorry.

After the visit, we met with a priest friend who lived in Rome for five years and recommended a nearby restaurant Hosteria Ago e Lillo, which was pretty good. We then headed over to the Bronze Door to pick up our tickets for the Papal Audience on Wednesday. You can pick up the tickets from 3–7 p.m. It’s the same line for “online reservations,” but only one person per party can enter (at least during the Jubilee).

From there, we walked over to see Castel Sant’Angelo, which is a block away from the Basilica, toward the Tiber River.

Castel Sant' Angelo

Then we took a bus to visit the Basilica of Saint Paul Outside the Walls. This is a beautiful church that hosts the tomb of St. Paul. It also features a painting of all the past popes, now including Pope Francis.

Basilica of Saint Paul Outside the Walls

<< Day 7-8 (Rome & The Vatican) Trip Itinerary | Day 10 (Papal Audience) >>


Trip To Italy: Days 7-8 (Rome and The Vatican)

To get to Rome, we took a regional train from Assisi Station to Roma Tiburtina Station. We stayed at the Best Western Globus Hotel which is near the station. To get around Rome, we purchased the 72-hour bus/metro/tram ticket for 18 EUR. On our first half-day, we had reservations for the Pantheon, which you can—and should—book here

The Pantheon

From the Pantheon, we walked over to the Fontana di Trevi, which was crowded as expected. 

Fontana de Trevi

Then we continued on to the Spanish Steps, and from there we took the subway back from Spagna Station.

Spanish Steps

Most of the restaurants in that area feel like tourist traps, but we found one that was surprisingly good: Taverna del Seminario.

On our first full day, we headed to The Vatican. We took Subway Line B and transferred to Line A, which was really packed around 10 a.m. The line to enter St. Peter’s Basilica wasn’t too long—we got in within 15 minutes. We saw La Pietà, attended Mass, and then headed down into the crypts, knowing we’d return the next day.

The Piety

Afterward, we took a bus back into Rome to visit St. Mary Major Basilica. This church hosts the tomb of Pope Francis, the Nativity Crypt, and the Salus Populi Romani, one of the oldest Marian images in Rome:  

St. Mary Major Basilica

It was past lunchtime, so we ate at Sapporo e Delizie which was a good choice. Next, we walked to the Basilica di Santa Prassede. This small church, a block away from St. Mary Major, hosts the Column of the Flagellation of Christ.

Basilica di Santa Prassede

From there, we walked south toward the Colosseum to see it from the outside. Then we took a short bus ride to Saint John Lateran—but we first stopped at the Pontifical Sanctuary of the Holy Stairs, which is right across the street.

The Colosseum

We then walked 500 meters to the Basilica di Santa Croce, which hosts relics including pieces of the True Cross, thorns from the Crown of Thorns, and part of a nail.

Basilica di Santa Croce

This concluded our day as we headed back to our hotel via tram.


<< Days 6 (Assisi) Trip Itinerary | Day 9 (Rome & The Vatican) >>


Trip to Italy: Day 6 (Assisi)

Our next stop was Assisi, a town we wanted to visit on our way to Rome. We took a train from Venezia Mestre. It’s a 2-hour ride to Firenze, where we transferred to a bus that took us to Assisi in another 2 hours. We stayed at Hotel Moderno, which is within walking distance from the train station.

To get to Assisi (up in the hills), you need to buy tickets for the Assisi Link bus. These tickets cost 1.30 EUR at the shop across from the station, or 2 EUR if you pay with your card/phone when boarding. The bus runs approximately every 15 minutes throughout the day.

Porta San Francesco

From the bus stop, we walked to the Convent of San Francesco d’Assisi. We first visited the lower church, which hosts the tomb of San Francesco. Then we visited the upper church.

Convent of San Francesco d'Assisi

From there, we walked to the Basilica di Santa Chiara. This church hosts the tomb of Saint Clare and also houses the original Cross of Saint Damiano.

Basilica di Santa Chiara

We then visited the Church of Santa Maria. This church hosts the remains of Carlo Acutis, who is set to be canonized in September 2025.

Blessed Carlo Acutis

There are many places to eat nearby—just make sure to check the bus schedule, as service becomes less frequent after 8 p.m. Despite being visited by many people, Assisi feels very peaceful, and the town is beautiful to walk around.

The next morning, we walked to the Basilica di Santa Maria, which was near the hotel. Inside is the Porziuncola. This chapel served as the headquarters for Saint Francis and the Order of Friars Minor (the Franciscans).

The Porziuncola

<< Days 4-5 (Venice) | Trip ItineraryDays 7-8 (Rome & The Vatican) >>


Trip to Italy: Days 4-5 (Venice)

We took a train from Milano Centrale to Venice Mestre, which is about a 2.5-hour ride. Our Meininger hotel was 500 meters from Mestre station. The hotel room was very spacious. Even though the hotel is a bit minimalist, it has a full-service bar and breakfast buffet. It is also conveniently located one block away from the bus stop to Venezia Santa Lucia.

To get in and out of the Venice islands, we bought the 48-hour bus + boat pass for 35 EUR. There’s also a 24-hour pass for 25 EUR. You can download their app here for more information. Unfortunately, you can only buy the pass electronically via WhatsApp. Otherwise, you can purchase the physical pass from shops in the train station, but they only took cash, so we chose to use the automated machines located at the bus stops outside the train station. I strongly recommend buying the pass because it allows you to use the water buses that take you to any of the Venice islands.

Once we reached the bus stop on the main island (Piazzale Roma), you walk to the water bus platforms and look for the one that takes you to San Marco. For instance, you can take Line 2 and get off at the Rialto stop, then walk over to San Marco Palace. Google Maps will help you find the best route, including which water bus lines to take.

St Mark's Square

We visited the Basilica di San Marco and also took the lift up to the Campanile di San Marco for 10 EUR. I was surprised there was very little line, as the view from the top is amazing. If it’s too crowded, you can buy skip-the-line tickets for specific times here.

View from Campanile di San Marco

We walked around San Marco, took some pictures, and then headed back to our hotel—which felt like leaving Disney World: walking to the water bus stop, taking the water bus, and then the bus to our hotel. In our case, the bus was always standing room only.

The second day we did the same to return to the main island. We visited Murano by taking Line 4.2. At Murano, we visited the Original Murano Glass Factory. This was really worth it. You have to pay 5 EUR for the tour, but there are many other factories you can visit as well.

Murano

From Murano, we headed to Giudecca, also using the 4.2 water bus. From Giudecca, we took Line 2 to the island directly across from San Marco. From there, we took Line 1 to return to the San Marco stop. We then walked to the Gondola San Marco stop in Bacino Orseolo (right next to Hard Rock Café). There are many locations where you can take gondolas, but we chose this one because it goes mainly through inner canals that are shaded. It does go through the Grand Canal but doesn’t pass under the Rialto Bridge—just next to it (at least on the 30-minute ride). Gondola San Marco seems to be the most common service and charges 90 EUR for a 30-minute ride for up to 5 people (increasing to 110 EUR after 7 p.m.). You can identify them by the signs with their published rates and they only take cash.

Gondola San Marco

In many ways, going to Venezia feels like going to Disney World. It can get very crowded. We visited in early June, and it wasn’t too bad. Except for a couple of water buses—especially the ones from Piazzale Roma or Rialto—we were able to find seats. It can also take a while (~1 hour) to get in and out of the main island, especially from San Marco. The alternative is staying in a hotel on the island itself, and there are many to choose from. I just didn’t want to deal with luggage transfers, but a lot of people do it.

Venezia feels like a maze—it’s fun to walk around, and we only covered a small portion in 1.5 days. You could easily spend 2–3 days if you want to visit it more thoroughly.

Also, don’t forget that even though you’re exempt from the Venezia Tourist Tax if you’re staying at a hotel within the Venice metropolitan area, you still have to fill out an exemption form.


<< Day 3 (Lake Como) | Trip ItineraryDay 6 (Assisi) >>


Trip to Italy: Day 3 (Lake Como)

As a Star Wars fan, I wanted to visit Villa del Balbianello. Unfortunately, even though tickets are free, they were sold out when I tried to book them—so I recommend booking at least two weeks in advance.

Tickets to Bellagio via ferry were also sold out. We weren’t too keen on going there anyway, as it takes two hours by ferry. Instead, we found a lake and train promotion for the First Basin, which includes four villages you can visit, up to Torno. The promotion is offered through Trenord. You can take any Trenord train; however, the ticket can’t be validated at the gates, so you’ll need to request assistance from the staff—at least at Milano Centrale. Otherwise, it was a great deal: 18.5 EUR for a round-trip train (to Como San Giovanni or Como Lago stations) and a ferry ride.

Lake Como - Cernobbio

When you reach the Como dock, ask for the dock number to the Primo Basin. In our case, it was dock 4. Be prepared to show your ticket any time you hop on the ferry. It takes 30 minutes to get from Torno to Como, and you can get off in any of the four villages, which were really worth it.

Torno

On our way around Como, we stumbled across this Gelateria Rossetti, which was likely one of the best gelatos we’ve had on this trip—and maybe ever.

<< Day 2 (Milan) | Trip ItineraryDays 4-5 (Venice) >>


Saturday, June 21, 2025

Trip to Italy: Day 2 (Milan)

In Milan, we stayed at BB Aparthotel Desuite, which we booked via Booking.com. The area doesn’t look particularly fancy, but it appeared to be safe—mostly residential apartments. It's conveniently located near a grocery store and just two Metro stops from Milano Centrale. The apartment was in excellent condition: clean, modern, and seemingly new. We really liked it and recommend it. Just note that it’s not a traditional hotel—the lobby is open during specific hours, and you’ll need to notify them if arriving outside of check-in hours (2–6 p.m.).

To get around Milan, we bought the 3-day ticket for 15.5 EUR, though a 24-hour pass is also available for 7.6 EUR. For more information, download the ATM Milano app, where you can also purchase electronic tickets.

In the afternoon, we booked tickets to the Duomo. The stair tickets were sold out, so we purchased lift tickets instead. The view from the top is absolutely worth it, and it’s fascinating to be able to walk on the roof of the cathedral.

Milano Duomo

View from top of The Duomo


Trip To Italy: Day 1 (Turin)

To get from Milan Malpensa Airport (MXP) to Turi we took the Flibco bus to Turin. It costs 22 EUR, departs about every hour, and stops at Porta Susa near downtown in Turin.

From there, we took the metro to Porta Nuova. The daily pass for metro/bus cost 3.7 EUR, which you can buy at the station. We stayed at the Best Western Crystal Palace, which is right across from Porta Nuova station.

The receptionist recommended having lunch on Lagrange Street, which offers several options. We ended up eating at Pastificio Defilippis, which turned out to be a great choice. We then visited the Basilica di Maria Ausiliatrice, which hosts the remains of San Giovanni Bosco.

Basilica di Maria Ausiliatrice

Next, we stopped at the Cattedrale di San Giovanni Battista, which hosts the remains of Pier Giorgio Frassati (soon to be canonized) and the Shroud of Turin, which unfortunately was not currently on display.

Cattedrale di San Giovanni Batttista

The next day, we took a stroll along the Po River and visited Parrocchiale della Gran Madre di Dio.

Parrochiale della Gran Madre di Dio

To head back to Milan, we took a train from Porta Nuova to Milano Centrale using Trenitalia.


<< Trip Itinerary | Day 2 (Milan) >>

Friday, June 20, 2025

Trip to Italy: Day 0 (Itinerary)

In June 2025, my family of four took a trip to Italy with a custom itinerary. In this blog series, I'll share some tips and suggestions in case you are venturing on a similar trip. 2025 was the year of the Jubilee for the Catholic Church. We had originally planned to attend a Papal Audience with Pope Francis, who passed away in May, so we were blessed to be able to meet Pope Leo XIV.

We flew out of Dulles Airport into Milan (MXP), with a layover in Frankfurt. It was more affordable than flying directly into Rome (FCO), and we also wanted to visit some cities in northern Italy. We found parking ($10/night) using SpotHero at a nearby hotel. Specifically, we parked at the Fairfield Inn Dulles, and their shuttle service was very convenient and fast since it's only a short drive away.

View of The Alps

Day 0: Washington Dulles (IAD) – Milan (MXP)  

Day 1: Turin

Day 2: Milan

Day 3: Lake Como

Day 4–5: Venice

Day 6: Assisi

Day 7–8: Rome and The Vatican  

Day 9: Rome and The Vatican

Day 10: Papal Audience

Day 11: Milan (MXP) – IAD

Day 1 (Turin) >>


Friday, December 08, 2023

How to fix leaky Moen Karis bath faucet (from Costco)

I purchased Moen Karis (84346SRN) single handle bathroom faucet back in 2022 from Costco. I installed it around Spring 2022. It started leaking after about 1.5 years. I'm sharing in this blog my experience fixing this leak and I believe the process is similar to most single handle bathroom faucets. 

Moen's warrants their faucets will be leak free to the original purchaser for as long as you remain the home owner: "If this faucet should ever develop a leak or drip during the Warranty Period, Moen will FREE OF CHARGE provide the parts necessary to put the faucet back in good working condition and will replace FREE OF CHARGE any part or finish that proves defective in material and manufacturing workmanship, under normal installation, use and service".

I contacted Moen via this form and sure enough they promptly shipped this replacement cartridge kit which the part is confusingly labeled as "202233 Screw kit" in their website. 

202233 Screw kit
202233 Screw kit (cartridge replacement)

Notice the form requires uploading a picture so I provided this picture of the leak:

Leaky faucet
Leaky faucet

Steps to replace the 202233 cartridge on Karis faucet

Step 1: first start by closing the hot and cold water intake.

Step 2: next, use the provided Allen key to unscrew the bolt from the back of the faucet.

Step 2: unscrew bolt
Step 2: unscrew bolt from back of faucet

Step 3: once the screw comes out, just pull the faucet handle upwards.

Step 3: pull faucet handle up

Step 4: you will see that there is a plastic cover part around the faucet (with a chrome finish). This is merely decorative, but it needs to be removed. This part just pops out, if it doesn't come out try turning it around and wiggle it until it comes out.

Step 4: remove plastic cover

Step 5: remove the black plastic nut. This turned out to be most difficult task. I first tried the installation part that comes with the faucet and I still had lying around. This is supposedly "Moen Installation tool 118305", but it's just not large enough. Even in the questions and answers, Moen Plus Support answered this is 13/16" on the large end. It needs to be 7/8" instead, which Moen confirmed after I contacted them.

Step 5: attempt 1 - using installation tool
Step 5: remove nut - attempt 1 - using Moen installation tool 118305

My second attempt was to use a regular 7/8" wrench but there is just not enough room horizontally to grab the nut.
Step 5: attempt 2 - using 7/8 wrench
Step 5: remove nut - attempt 2 - using 7/8" wrench

My 3rd attempt was to use a regular adjustable wrench, but had same results, not enough room horizontally and the wrench was too wide to try it vertically.

Step 5: remove nut - attempt 3 - using adjustable wrench

I dit not have a 7/8" socket to try, but I knew a regular socket would be too wide to fit. I headed to my local Ace Hardware store and they suggested trying this "Tub & Sower Valve Wrench Set". It comes with one that was 29/32" which I thought would be close enough, but it ended up being too large to fit in (luckily I was able to return this).

Step 5: remove nut - attempt 4 - using 29/32" snug socket

I was about to give up and I reached out to Moen and they kept insisting that any 7/8" wrench would work. I searched for "snug 7/8" wrench/socket" in Amazon and came up with this "Amazon Basics plumbing adjustable wrench" that I thought was worth a try. I first tried horizontally and no movement at all... but then I tried vertically (as shown in the picture) and voila! The nut finally came out very easily.

Step 5: remove nut - success with Amazon Basics plumbing adjustable wrench

Step 6: remove cartridge by pulling it out

Step 7: install the new cartridge. Just need to align the openings.

Step 8: install the plastic black nut. It's always a good idea to apply silicone grease around it. Use the same plumbing wrench to tighten it.

Step 9: replace the chrome plastic cover - almost forgot about this one!

Step 10: replace the faucet handle.

Step 11: put back the bolt using the Allen key.

Step 12: reopen the water supply and test it. In my case the leak was completely gone!

Here is a time lapse video showing the whole replacement process:


Wednesday, November 29, 2023

My T-Mobile Trade-In with Apple nightmare ...with a happy ending

I am T-Mobile customer on the Go5G Plus plan and when the iPhone 15 was announced I decided to trade in my iPhone 12 which qualified for a $0.00/mo over 24 months offer. I chose to place my order via Apple.com. Here are the details of the promotion, which I followed to the letter:

Order details

Here is the chronology of events:
  • September 15: placed my order via Apple.com opting for the trade-in offer above paying only $38.78 for taxes and confirming all the terms as expected:


  • September 21: received "Your trade-in is in the works" email notification from Apple again showing all the terms were correct:
Trade-in terms


  • September 22: received iPhone 15 on launch date!
  • September 23: received trade-in kit box
  • September 28: sent iPhone 12 in trade-in kit box via FedEx Home office (kept tracking receipt - VERY IMPORTANT!)
  • September 29: FedEx tracking shows trade-in kit was delivered
Trade-in tracking


  • September 30: Received "Your Trade-in is a success" email from Apple!
Trade-in confirmation
  • October 2: Received my T-Mobile bill without the trade-in credit, so ended up paying $23.09... but the terms of conditions do specify that it may take 1-2 bill cycles for the credit to appear so I decide holding off from calling T-Mobile...
    • iPhone 15 - Black - 128GB
    • ID: 20230914...., Balance: $554.00, Installment 1 of 24 $23.09
  • October 30: My 2nd bill is not yet issued, but I see no signs of the Trade-in credit on T-Mobile, so I decide to contact customer service via chat on the application. I provide all the details above to Lizeth: terms, dollar amounts, etc. They asked me for the IMEI of my trade-in (iPhone 12) which luckily I had saved. They asked for the receipt, which I provided but it was from Apple so they do not seem to have any record about this. I provided a screenshot and also a PDF with all the details from Apple about the order. That still was not sufficient. They then asked me to provide the tracking for the trade-in which luckily I had also saved. That was not enough, so they told me they needed more time to research this and then they scheduled a follow up call for November 8th.
  • November 8: I get the call from Lizeth from T-Mobile but missed it because I was on a business call I couldn't get out from. They left a voicemail indicating they still need more time to research this and that they will call me back on November 15.
  • November 16: I get a call back from Lizeth indicating they still had no resolution for me but that it had been escalated on their end and I would get a call back the following day.
  • November 17: Lizeth calls me back to let me know that they had no record on the trade-in and that there was nothing further that T-Mobile can do to solve this. I then asked to escalate this to a supervisor. The supervisor calls me back stating the same thing and suggesting that I reach out to Apple. I had already contacted Apple via chat and they had given me all the details I had provided to T-Mobile, so I asked how Apple can get in touch with T-Mobile to resolve this since me providing the information from Apple was not enough. The supervisor then suggested that I called Apple and bridged a call with T-Mobile. I proceeded to call Apple and explained the situation. David from Apple agrees to speak to T-Mobile customer service, so I called T-Mobile. After 20 minutes on hold, T-Mobile answers the call and it was like starting over. I explained that I had Apple on the line but apparently he was not interested on talking to them. After 20 more minutes of T-Mobile doing research I decide to bridge the calls and David shares all the information that T-Mobile asks for. After another 20 minutes of no progress, I ask to speak to a supervisor that can actually solve this. Another T-Mobile supervisor joins the call and after some research she claims she found the order and that is stuck in "running" and that is why the credit was not applied but not to worry, I would get my credit in 2-3 business days and just asks me to wait for a few minutes. I thought "finally!", after 10-15 minutes of being on hold, the supervisor comes back and says that the order was actually a business order and that was not eligible for the promotion. I explained this was a personal order and I have never had a business account with neither Apple or T-Mobile. I had to drop for a show at that point and asked her to solve this and give me a call back. She agree to call me back in the week but it didn't sound like I should expect a different outcome. This call ended up being 1hr 37 minutes with no progress. Kudos to David from Apple for sticking around this long!
  • November 20: I had no idea what to do at this point. I was going to wait for the call back but I felt I was just going to hear the same story. I felt defrauded and the worst part was that the offer was still active and I followed it to the letter. I thought I could not be the only one going through this situation. So I googled, and came across this reddit post that turned out to be a lifesaver! This confirmed that I was not the only one going through this, and this was a post from 2 months ago. Multiple users were reporting that the only way they got this solved was by contacting T-Force. I had to also google how to do that, but apparently that is just a different customer service team from T-Mobile that is only reachable via Facebook or Twitter (now X). I had contacted T-Mobile via Twitter in the past so I decided to give it a try. I sent an initial message with the summary of my issue. I immediately got prompted to verify my T-Mobile account, which I did. I then waited 20 minutes for a response, which didn't sound promising. To my surprise Becky responds back apologizing for this issue but that she was going to fix this right away. I was obviously very skeptical at this point. I asked for confirmation that we were talking about the same offer and she confirmed it again apologizing as if this was a very common known issue. That very same day in the afternoon I get a text message confirming the promo was getting applied to my line:
    • T-Mobile promo message: Line XXXX is scheduled to receive a monthly bill credit for Apple Retail Trade ID230182 as long as you maintain eligibility
    • That promo ID is by the way something T-Mobile customer service kept asking for, but Apple was not able to provide.
    • I checked my T-Mobile online account and the trade-in credit was finally showing correctly applied!
    • Becky let me know that there was a small possibility that the promo could get rejected so she scheduled a follow up for the next week.
  • November 27: I kept checking my account almost every day and the credit was still there, which Becky confirmed that all still looked good but she scheduled another follow up the next week to do a final check after my November bill cycle!
Lessons learned
  • I have done all my trade-in promotions directly with T-Mobile with no issues. In fact I did another one this year and that was correctly applied right away. This does not justify this issue. Apple needs to demand that T-Mobile gets their act together or stop offering this trade-in promotion via their website. The main reason why I chose to do it with Apple this year is because the trade-in credit over 24 months makes it $0, where T-Mobile gives you part of the credit as an instant credit instead of spreading over 24 months, which adds a small amount to your bill (e.g. $6.67) and I preferred not increasing my bill.
  • T-Mobile Customer Service quality has suffered greatly over the past few years. I also speak Spanish, I dealt with another issue earlier this year, and I ended up calling customer service in Spanish instead because they seem to have better and faster response.
  • You may wonder why I'm sticking with T-Mobile after dealing with these issues, well, they still seem to have the best value in terms of service/offering, but just hope you don't have to deal with customer service.
  • If you are having a similar issue, contact T-Force right away! I wrote this blog to hopefully save you some time and anger dealing with this! 

Friday, September 29, 2023

Pilgrimage to El Camino de Santiago

On September 2023 my wife and I embarked on one of our best adventures in our life, a pilgrimage on El Camino de Santiago de Compostela. In this guide I will share some tips, recommendations and highlights from our pilgrimage.

Plan your trip

Where to start?

There are many ways (caminos) to get to Santiago. The most popular way is the French, and specifically the last 100km of the way, which is the minimum distance required to earn the Compostela (certificate). If you choose to take this route, most people will start at Sarria, which is actually 115km away from Santiago. This guide assumes that you are starting in Sarria.

How many days do you need?

The next decision is how many days do you want to walk. Most people in healthy age/conditions will choose to complete it in 5 days. If you do the math, that is an average of 23km per day, hence some people will break it in 6 or even 7 days. Because of limited travel days, we had to complete it in 4 days. I strongly do not recommend doing it in less than 5 days, unless you are in a similar situation, in which you essentially combine the last 2 segments which is a whooping 38km in one day.

5 day itinerary

  1. Day 1: Sarria – Portomarin (22.2 km)
  2. Day 2: Portomarin – Palas de Rei (24.8 km)
  3. Day 3: Palas de Rei – Arzua (28.5 km) - the longest segment. If you want to do it in 6 days instead of 5, a good town to add is Melide which is right in between the 2 cities, making each segments under 15km.
  4. Day 4: Arzua - A Rua (18km) - an alternate town is O Pedrouzo, which is next to A Rua. Some pilgrims may walk all the way to Lavacolla which is past the Santiago airport and less than 10km away from Santiago. 
  5. Day 5: A Rua - Santiago (20k)

What to pack?

I wish this video was available in English because it has very good information and tips. Here is my list:

  1. Backpack - Decathlon Quechua MH500. Even if you don't intend to carry your bag in your pilgrimage, this is a really great backpack for traveling and carrying all the stuff you'll need in the pilgrimage. 30L is a good size for 5 days, I would not recommend anything smaller than 28L. If you use something larger than 30L be careful with the weight. The recommendation is less than 10% or your weight and no more than 10kg total. This bag already comes with the rain cover, otherwise a bag cover is a must if you will carry it in your walk.
  2. Small backpack - Salomon Trailblazer 20L. I didn't use this particular one, but if you opt to have your hiking backpack/luggage transported, you will need a small, comfortable and lightweight backpack that you will carry during you pilgrimage with your essentials. This can be anything from 10L to no more than 20L capacity. 20L may seem like a lot, but keep in mind what you want to carry here: light rain jacket, poncho, charging cable, spare battery, headlight, water bottle, emergency kit, etc.
  3. Waterproof hiking shoes, e.g. Moab Speed Gore-Tex. I really liked these ones. I could have gotten away without gore-tex because it did not rain enough for the shoes to get wet. The most important thing is that you try the shoes on a trail and know that they will be comfortable for very long walks.
  4. Hiking socks - socks are almost as important as the shoes. You want comfortable socks, they don't have to be water proof, but ones that you have tried and know are comfortable for long walks.
  5. Light rainproof jacket - it will likely rain one or multiple days.
  6. Poncho - I brought a cheap one, but it is a must, in addition to your rain jacket.
  7. Trekking pants - I was not a fan of these pants but ended up using all walking days. You want them to be thin and lightweight. I bought the convertible type, but did not end up using them as shorts, because I quickly learned that the pants help blocking sand/small rocks from getting into your shoes.
  8. Trekking pole - in our case, we used one each, which I think it is enough, but I strongly suggest using one, it really helps. We actually bought them at one of the souvenir stores at Sarria, they are about 12EUR and lasted the entire pilgrimage.
  9. Water bottle (~24oz), e.g. hydroflask. 
  10. Hat - this can be a water proof hat or it can be a baseball hat, whatever you find most comfortable for blocking sun and water.
  11. Technical/Running shirts - use them every day, it will help with sweat and they are also lighter and dry quicker in case you need to wash them during the pilgrimage.
  12. Clothing for 5 days: pijama, underwear, etc.
  13. Travel laundry sheets - even if you don't plan to wash your clothes, these can come in handy
  14. Spare sandals (e.g. Teva) - I almost did not take these, but my wife strongly recommended them. As soon as you get to town, you will want to switch to these so that your feet can take a break from the shoes.
  15. Sunscreen - small to be able to reapply throughout the day.
  16. Emergency kit - primarily bandaids in multiple sizes and vaseline for bruises
  17. Feminine products - if applicable
  18. Cottonelle wipes - just in case!
  19. Cash - i.e. Euros and make sure you have small bills (i.e. 5-20)
  20. Portable USB battery - make sure it is not too heavy but also large enough to give you close to a full recharge in case needed.
  21. Headlight - just in case you want to leave early while it is still dark, or end up arriving late.
  22. Phone charger cable
  23. International data plan - in my case, I had it included with T-Mobile and you can get decent signal throughout most of the way.
  24. European travel adapter - if applicable
  25. AirPods - I'm not a fan using AirPods, but it really helped listening to a podcast specially on the harder parts.

When to travel

I heard that statistically in terms of low rain/heat the best time to travel is late May/early June. In my case we traveled mid September and it was very good in terms of weather and not too crowded.

During your pilgrimage

How to get to Santiago

Look for tickets to SCQ. Most European airlines travel there, e.g. Ryan Air, Iberia/Vueling, Air France, Lufthansa, etc.  There are multiple daily flights from Madrid so that may be your best choice for connecting. Arrive at least a day earlier from when you are starting el Camino. You will learn that there is no Uber, Cabify or similar ride sharing services in Santiago. There is a bus from the airport to Santiago, otherwise try arranging a taxi with your hotel, as they may be able to get you a cheaper fare.

There are multiple places where you can get your Pilgrim Passport, but if you have time I recommend you get it while at Santiago just in case. You can get this at the Pilgrim's office, which is behind the Cathedral. The office is open daily from 9am-7pm.

Alternatively if you fly to a nearby city, e.g. Madrid, Porto, Vigo you could take a train to Sarria. Remember that most courier services will transport cabin bags under 15kg.

How to get to Sarria

Apparently there was no direct bus to Sarria from Santiago until recently. The bus departs daily at 11am and gets you to Sarria by 1pm. You can buy these tickets with Monbus. When you get to the terminal if you see a lot of people waiting for the same bus, do not panic, I learned that they actually send multiple buses based on demand, just make sure you get on the ones that are nonstop to Sarria.

Day 1: Sarria - Portomarin (22km)

Most people will stay the night at Sarria and start their pilgrimage the following day. In our case, because we were time constrained we actually started walking that very same day. If you do that, I recommend eating lunch before leaving Sarria, as we did not find many places to eat that were open (maybe because of the time).

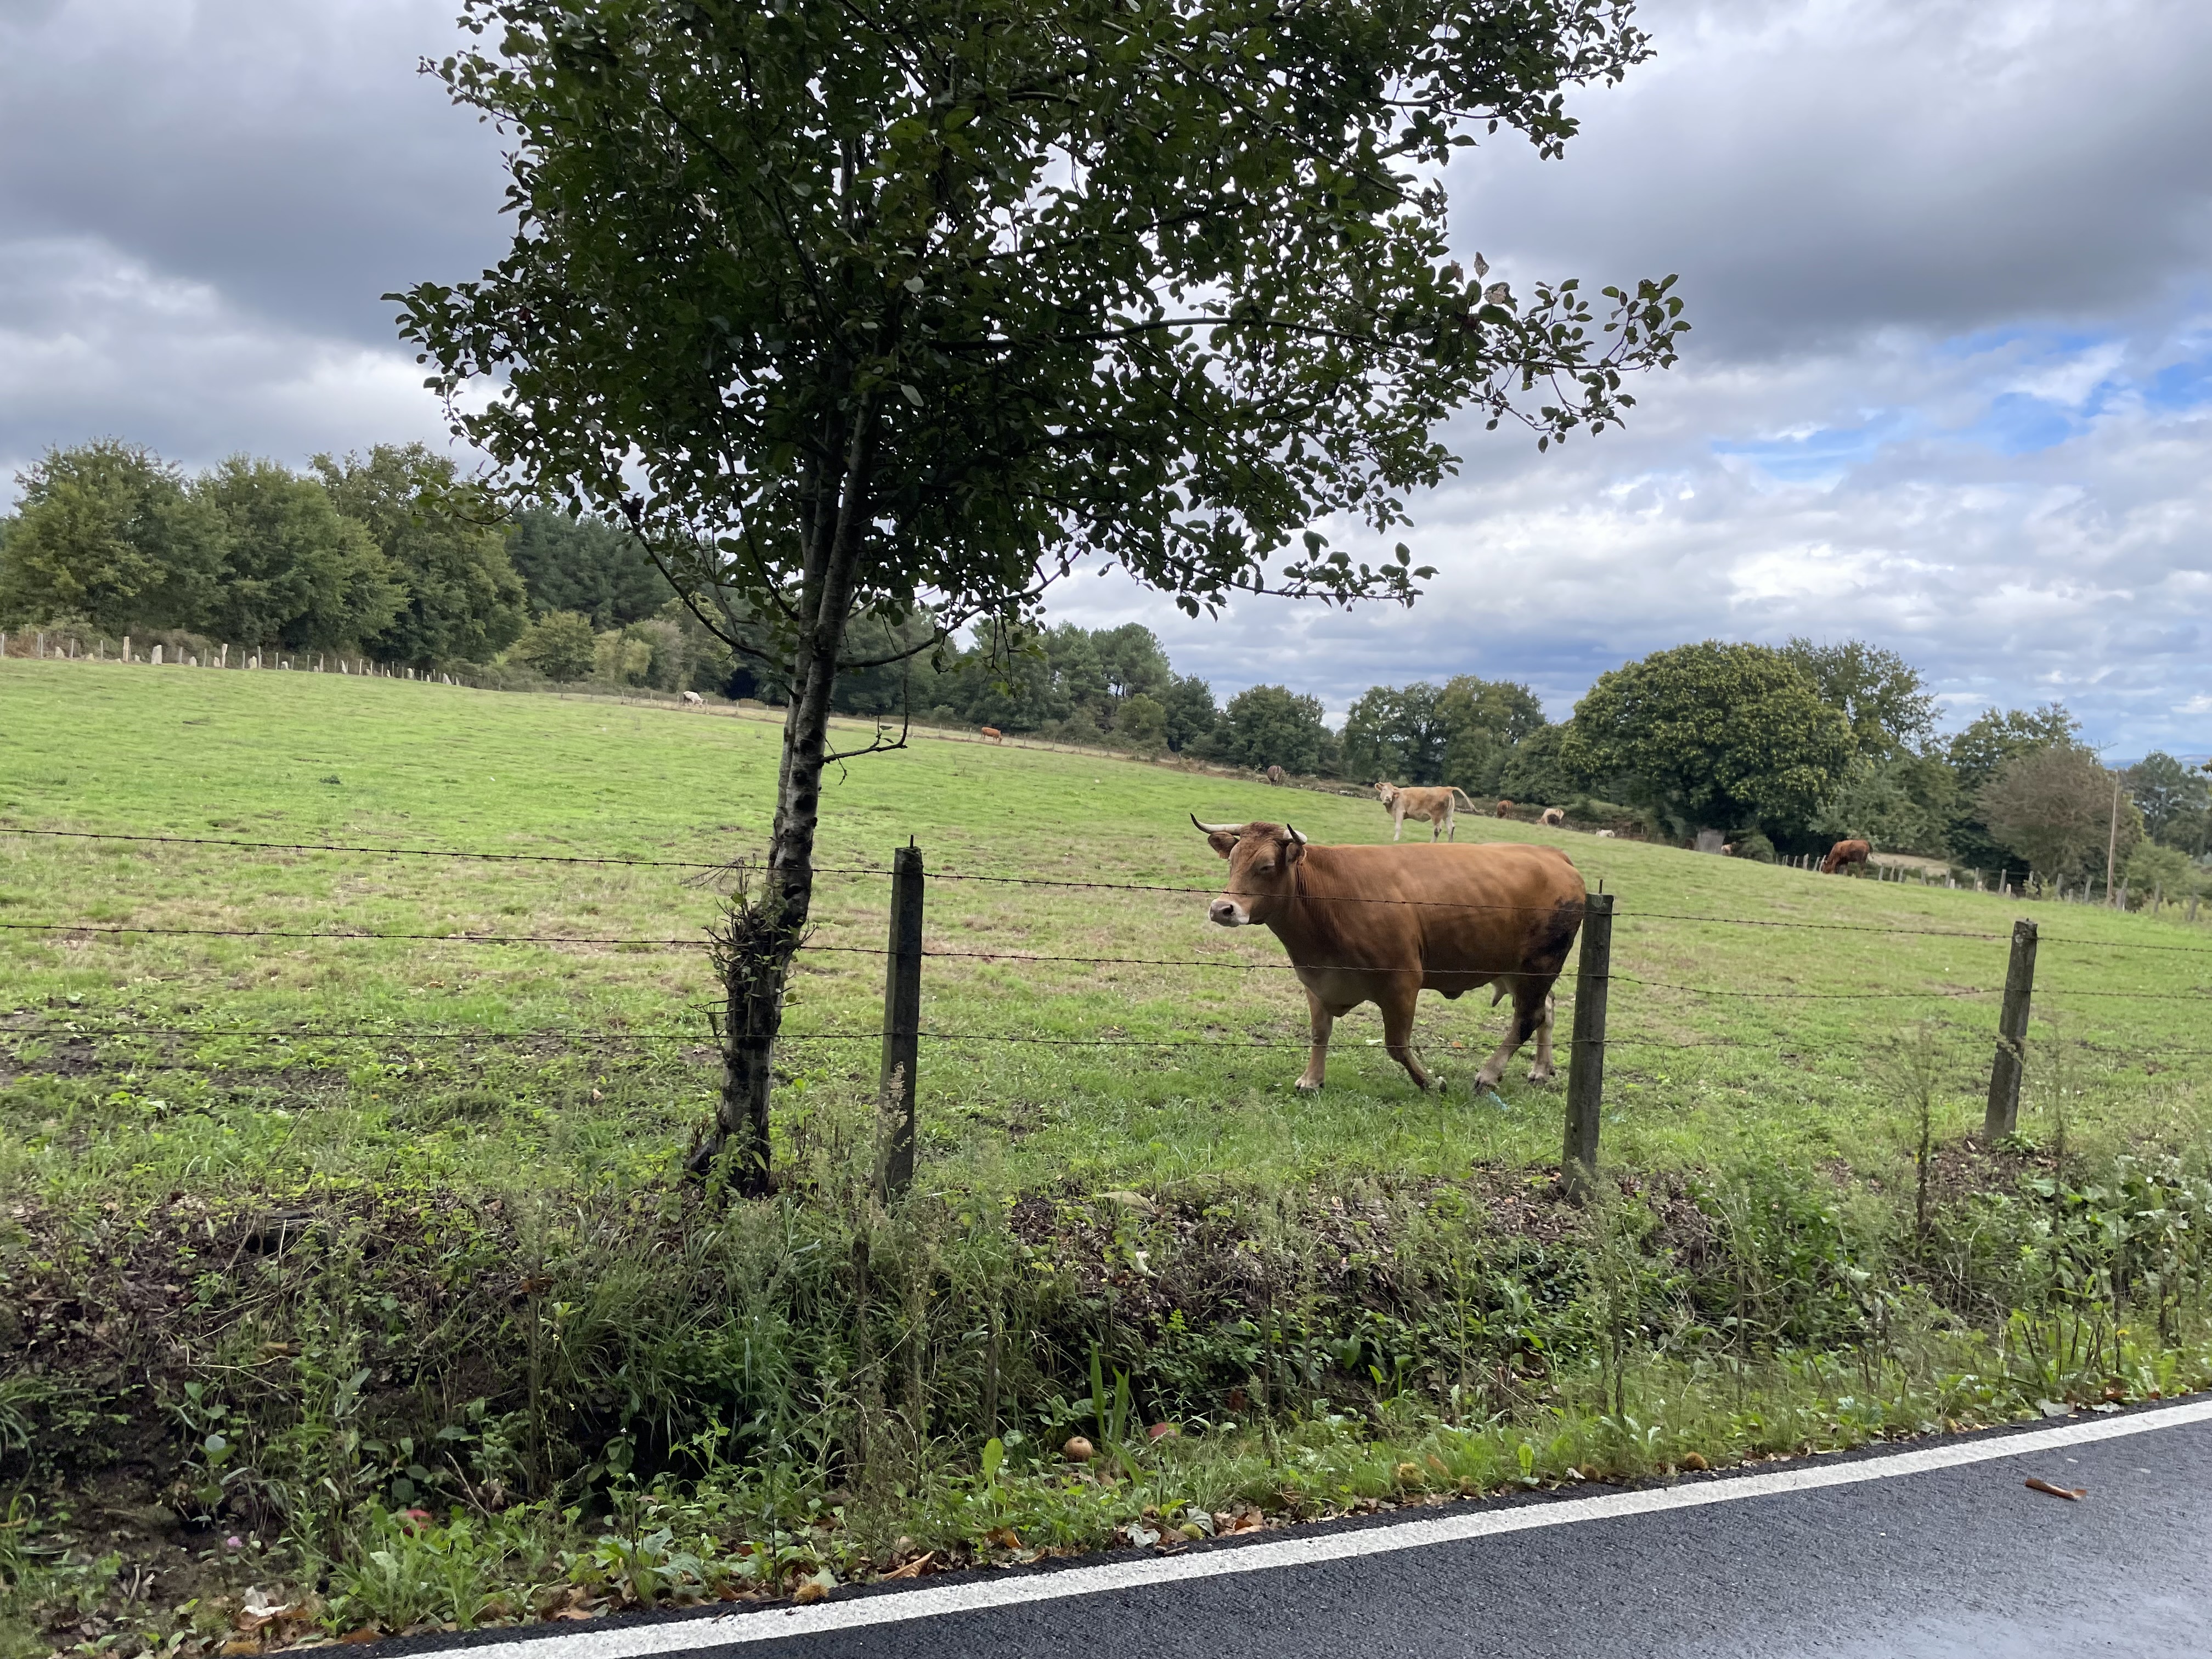
In this segment we noticed an abundance of 2 things: apple trees and oxen ("rubias gallegas" - blonds from Galicia). We were told the apples are for pilgrims and oxen. Because we started late, we encountered very few pilgrims (less than 10). We were able to reach Portomarin before sunset (by 8pm).

Oxen (Rubias Gallegas)

Where to stay at Portomarin

We stayed at Hotel Vistalegre, which is a gem. It is right by the Portomarin city sign and a really nice hotel. Our flight to Santiago was diverted to Bilbao and were sent via bus by Lufthansa (which refused giving us any compensation because the flight made it to Bilbao within less than 3 hours), so we had barely slept the prior day. We slept incredibly well at this hotel. This hotel was not available when I initially booked our travel months ahead, but I assume due to cancellations, a double room was available just 2 weeks before travel. We booked this through Expedia.

Portomarin city sign

Day 2: Portomarin - Palas de Rei (25km)

Because we had barely slept the prior day, we decided to sleep in late and departed Portomarin around 10:30am. Make sure to stop by the downtown church (San Nicolas) before leaving. Because we departed late, there were not too many pilgrims but a lot more than the prior day. The hotel receptionist said we should be able to reach Palas de Rei by 5pm, but we were maybe too tired, because we did not reach there until around 6:30pm.

Palas de Rei - San Nicolas

We carried our hiking backpack the first 2 days. Because we only had 4 days to complete El Camino we decided we were going to send our backpacks with the local couriers at least for the last day. Because I was able to buy small backpacks in a local store at Palas, we ended up sending it since day 3 and it was one of the best decisions in our trip. It made a huge difference.

Where to stay at Palas de Rei

I booked Pension San Marcos at Portomarin through booking.com. I also switched to this hotel 1-2 weeks before the trip as it was not available early on. They have both private and shared rooms. The private rooms were really nice, except for a room emergency light that could not be turned off. This hotel is also right on El Camino and next to the local church (San Marcos). Most pilgrim masses are at 7pm.

Day 3: Palas de Rei - Arzua (25km)

We started our walk at a more typical time (8:30am). We definitely saw more pilgrims at this time. We reached our half way point (Melide) right around 1pm. Melide is a good city to sleep in, if you want to add an extra day. We had heard several recommendations about Pulperia Ezequiel as the best pulperia in Galicia and it did not disappoint! We obviously tried their octopus. Something we did not try here but later try was the zamburiñas (scallops) and they were delicious. Their local white wine was also pretty good and like in most of Spain, very affordable.

Octopus from Pulperia Ezequiel

On our walk to Ezequiel we had seen a restaurant named Alborada that sold homemade ice cream and we stopped there afterwards and it was delicious. Their food also looked really good, so that is another recommendation in case you do not like octopus.

Where to stay at Arzua

Arzua is one of their largest towns you can stop, so you will likely find more choices to sleep. I noticed there were several whole apartments available when booking travel. We stayed at Casa Teodora which is pretty good and chose to dine at their restaurant as well.

Day 4: Arzua - O Pedrouzo (19km) & O Pedrouzo - Santiago (19km)

Again, I do not recommend combining these 2 days into one, unless you absolutely have to. Because we had our longest day to go (38km), we left earlier at 7:30am and reached our halfway point (O Pedrouzo) around 1:30pm. We only stopped for lunch there, this is one of the few towns that el Camino does not go through the middle of the city, but only around it.

The last part of El Camino was nearly deserted in the afternoon. We only saw some bicyclers. We reached the outside the city of Santiago around 7pm and made it to the Cathedral before 8pm!

Cathedral of Santiago

What to do once you reach Santiago

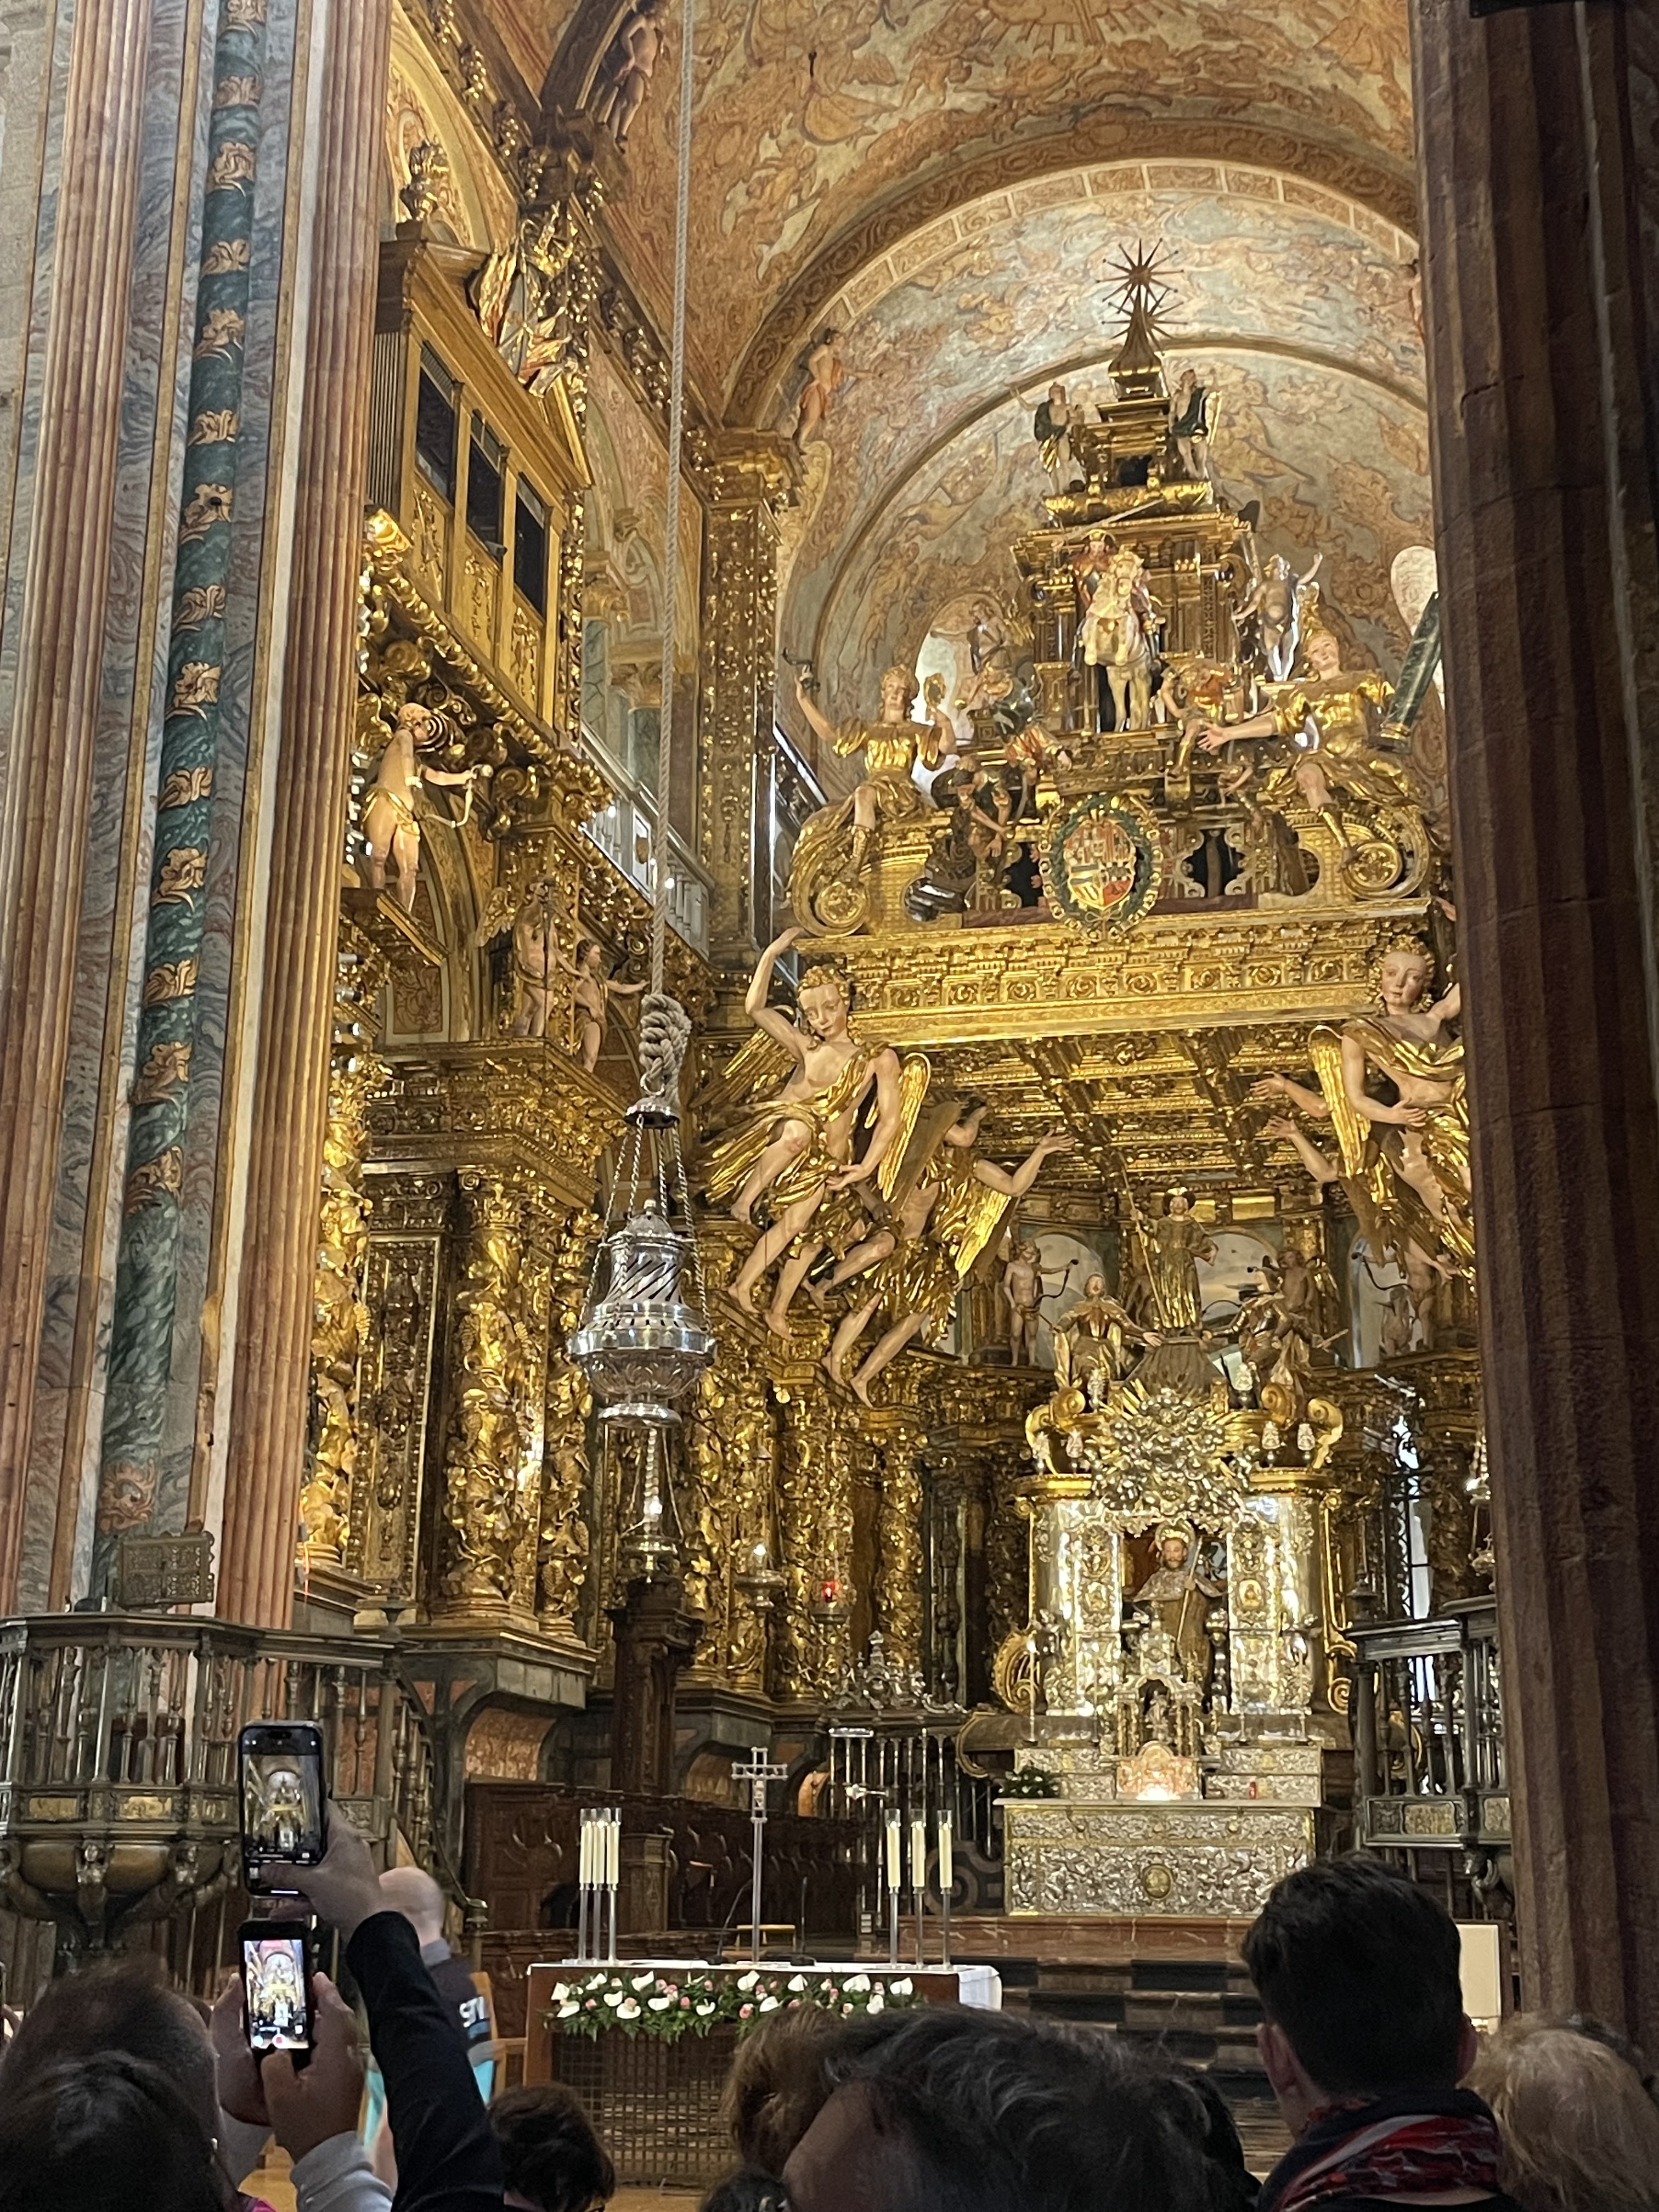
By the time we reached the Cathedral we were exhausted so we headed to the hotel afterwards. The next day, we stopped by the pilgrim's office to get our Compostela. The earlier you go there, the less people you will find. It was not too crowded by 10am and we were in and out in about 15 minutes. We then headed to the Cathedral to visit the tomb of Santiago. You enter the tomb from the left side of the Cathedral. It will take about 30 minutes to complete this depending on how busy it is. We then headed to the right side of the Cathedral to attend mass at noon. It was standing room only even though we entered by 11:30am. I recommend attending the pilgrim's mass at 7am or 9am if you want to avoid crowds.
Pilgrim's Mass


Where to stay at Santiago

We stayed at Hotel Palacio del Carmen. This is now owned by Marriott and we had points. This is a very nice hotel. You should be able to get a decent rate if you book a few months in advanced, but there are many other good options to stay.

Things I wish somebody had told me and general tips

  1. Not as many water fountains. We were told we would find multiple water fountains where you can refill your bottle. That was not our impression. I would say they were scarce, so I recommend taking a medium size (16-20oz) water bottle. The large water bottles (1.5 liters) are very cheap (1.5EUR in most places), so I recommend stopping by a coffeeshop to buy one and refill your bottles as needed. Also you will notice at blue can drink called Aquarius. This is a sports drink and it comes in multiple flavors. The orange one wasn't as good as the lemon one which tastes like a very refreshing lemonade. Aquarius quickly became a favorite in our stops.
  2. No public restrooms. There are no public restrooms throughout el camino at all. The restrooms available are from restaurants and coffeeshops. Most restaurants will let you use their restrooms, others may ask for a donations and others are signaled as only for customers. In most cases, we used the restrooms when we had to stop for water or buy a banana/snack.
  3. Best app - Buen Camino. This app was very useful. It will give you a list of towns in each segment as well as some general tips/warnings (e.g. dangerous crossings). It also gives you the profile, as well as the approximate distance by type of road (trail vs road).
  4. Trails, trails, trails! I wish somebody had told me that most of El Camino except for the last 10km consists of trails. They are not very technical trails, but some trails are rough with some challenging uphills and downhills. Trails in general are better (softer) for your knees, but they require significant more effort compared to roads. I was not expecting to get this tired from walking 13+ miles on trails, but I was, almost comparable to running a half marathon per day. Not only your feet will hurt, but muscles in my upper legs were very sore. This is why it is important to rest most of the afternoon and do El Camino in at least 5-6 days.
  5. No Uber or Cabify (popular in Spain) service. You need to request a cab by calling a phone and it seems most taxis will not stop by hailing them. Our ride back to the airport was surprisingly cheap $22EUR, but we were told that is a negotiated rate by the hotel and apparently it is the same rate within the city. I recommend scheduling your taxi through the hotel if that's an option.
  6. Most pilgrims start and end early. We noticed most pilgrims start their walk between 7-9am. If you prefer walking with the crowds, then start early. If you prefer going solo start late, after 10am. However you will notice several restaurants and coffeeshops close by 5pm, so plan your walk and stops accordingly.
  7. Don't forget to stamp your passport (2 seal per day required). This is required to get the Compostela, i.e. a certificate proving you completed the minimum distance (100km). It is a pretty cool souvenir with your name and it is written in Latin. Almost every single establishment will have their seal, so no need to stop everywhere, you can stamp wherever you stop for food/drinks.
  8. El camino is very well signaled. You will notice the iconic signs everywhere there is a fork or turn. These will have the remaining distance to Santiago. Alternatively you may see yellow arrows or printed signs, specially when going through towns. It is rare to not see a sign within 200-300m, so if it you do not see one, double check to make sure that you are still on the right way.
  9. Book your hotels ahead of time. Unless you are young and do not care where you sleep, you should book hotels ahead of time. The most popular booking site appears to be booking.com. Most hotels do not require pre-payment and can be canceled up to a few days ahead. The only downside of booking ahead, is in case that you have to re-arrange your trip in case of an unexpected delay. Most hotels are cheap, $50-$70 for a double room with private bathroom. You will not be without a bed to sleep, there are many albergues (hostels), however plan to arrive earlier (by 3pm) if you do not have a place booked. If you book a few weeks in advance, you should be able to find hotels alongside El Camino. The last thing you want to do is have to walk a few miles away from El Camino when you are very tired. Some hotels that are not near El Camino may offer ride to and from El Camino.
  10. Don't carry your backpack! We carried our hiking backpack the first 2 days and it was a nice experience. Some hardcore people may say it does not count if you hike without your backpack, but you will see that the walk is hard on its own, so don't try to be brave unless you are a young soul. The backpack transportation service is extremely reliable and inexpensive. You drop your bag in your hotel, usually before 9am and they will drop it in your next hotel that day by 2pm. You can book your backpack transport with the postal service. It costs 4-5EUR per day, and you can book you 5-day itinerary for 20EUR. We did not book it ahead of time, instead we got an envelope from the hotel and just added 4EUR on the envelope and attached it to the bag. The courier company we used was JacoTrans. These prices are for backpacks or cabin suitcases under 15kg, but I saw some larger suitcases so they may have a different rate for those.
  11. Speaking Spanish really helps. I noticed some of the locals in the small towns did not speak English. In fact in some cases their primary language was Gallego, but most everybody spoke fluent Spanish.

I hope you enjoyed this guide and if you have any questions do not hesitate to ask in the comments. Buen Camino!